Let me say first, that I live in México City, and my english is pretty bad, so, I recommend you go through all the photos first.
If you prefer to read the whole history, lets start!
I bought a Surface Pro 3 with i7 processor and 256 GB SSD on Amazon for 1,340 USD (before Microsoft cut 100 on original price), without keyboard neither pen, and plan to upgrade it to 1TB!!.
I was looking for someone that has succesfully open a Surface Pro 3. Unfortunately I find no one, IFixIt can made it, but with a big crack in the screen, CNET do the same. I find a great idea in a little post. At first it looks easy, but believe me, you must have the right tools and patience, a lot of patience.
First I grab an image of the inside of the Surface Pro 3, then, using Power Point, I print it closer to the real size, the image have a low resolution, but you can see very clear where is the msata SSD.


And make the marks to cut a "window" to the SSD.

From the beginning, I consider 3 things, first, it will be very dificult to make a perfect cut, second, surely the material of the "window" will end in the trash (or in a nice key chain), and third, I must consider to make a little square inside the "window" cut, in order to avoid the screw attached to the back of the Surface.
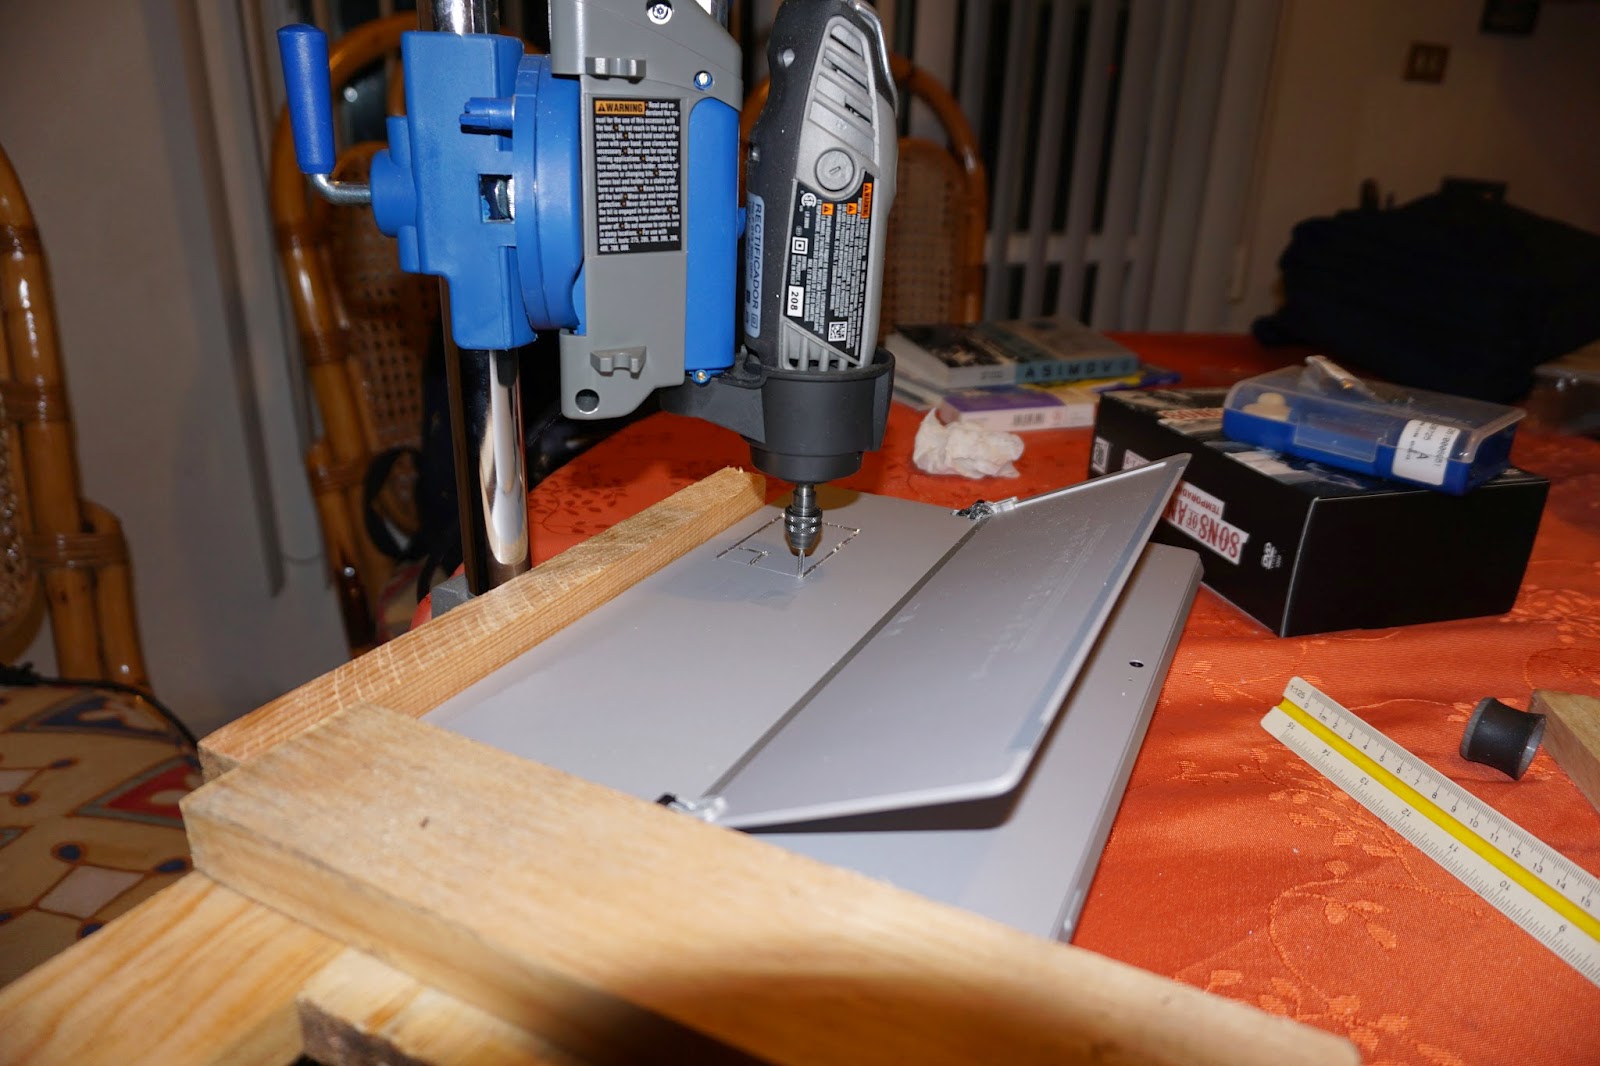
My cut tool was a Dremel, with the stand to make it a drill.

I start to make the cut with a medium-hard tip, I have the wrong conception that VaporMG (the material of the Surface Pro case is made of) was metal over plastic, but is all metal!!
The first cutting tip that I try, was only capable of make a medium scratch.

So, I try another 2 tips, until realize that this metal need a really bad-ass cutting tip, a tungsten carbide cutter tip, its the first from right to left.

This tungsten tip cut the VaporMG like if it was wood, it took me a little to control the cut.

I'm was happy with the first line, so I decide to continue.


At the end, the window was not perfect, but was in the right place.

At this point, some of my worst fears of this upgrade come to me, so I check if the Surface still boot.

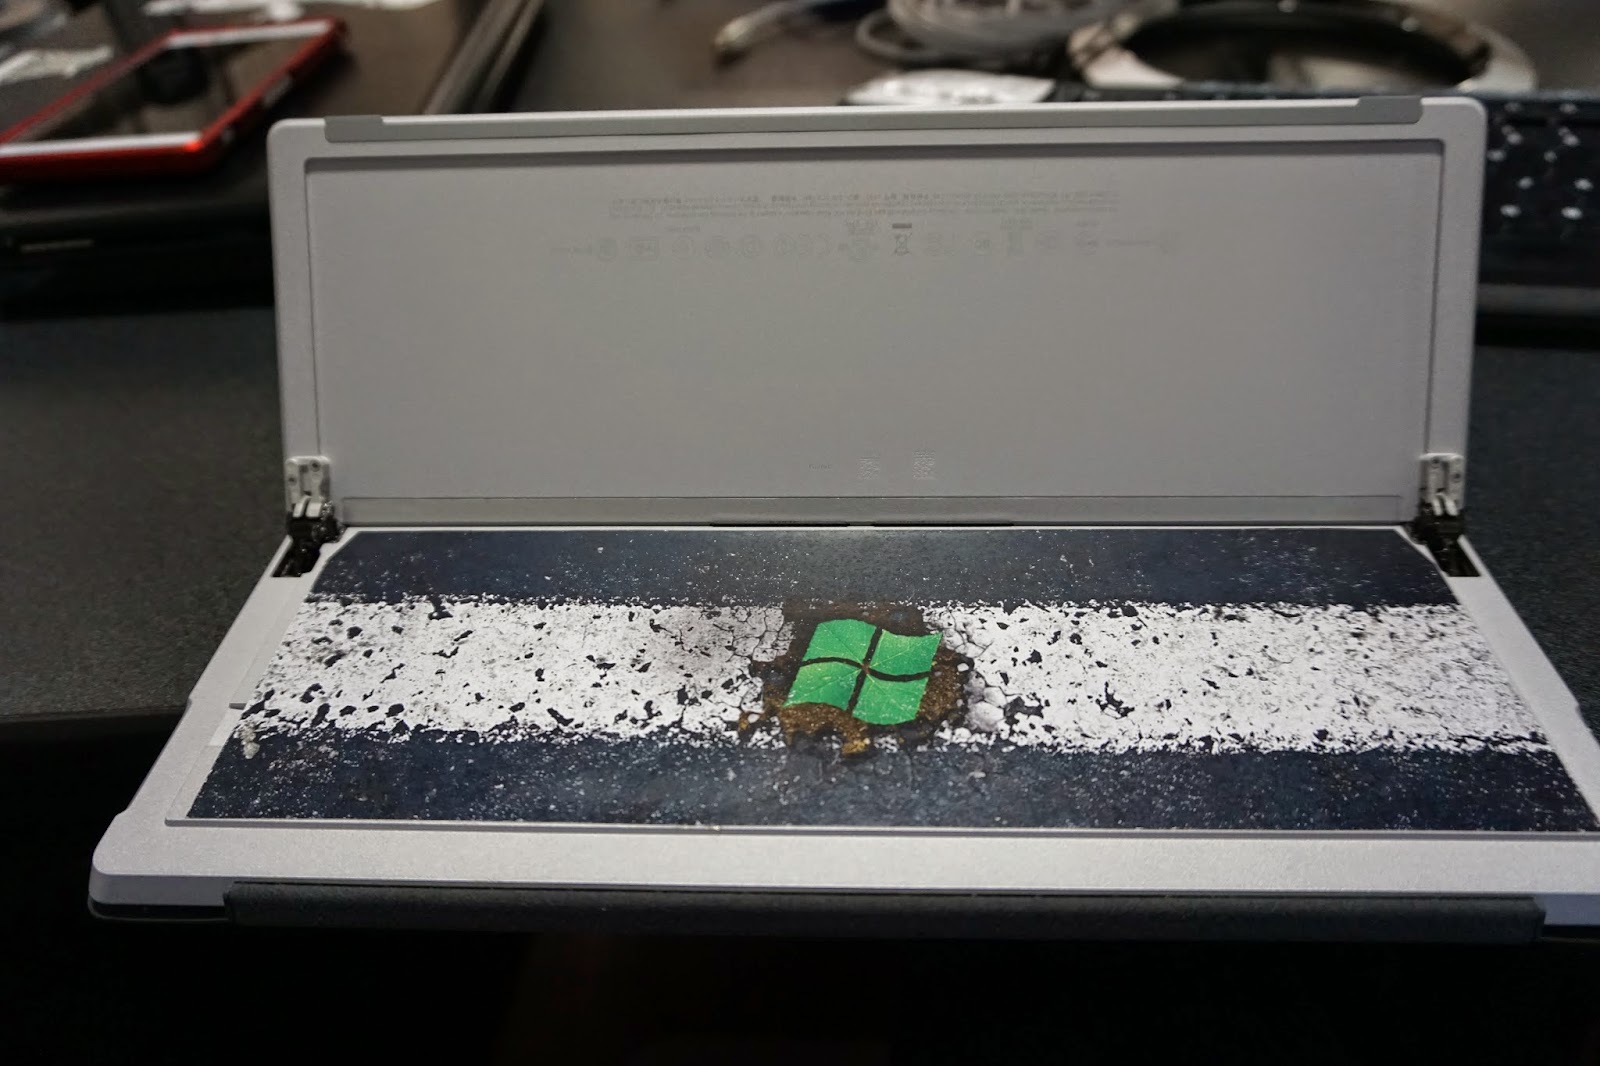
Ok, looks good, the next part is to take off the "window", using a wood tip, and a metal key from the dremel.

After a little effort, I finally get the "window"off, except for the little square that was attached to me SSD with a screw.

Taking off the little insulating tape, and using my dremel with a normal cutting tip, carefully separate the support of the second screw of the SSD.

This cut was really easy, and fortunately I can take the SSD a little up, the black part in the "window" close to the windows logo is the battery, and I dont even have to move it, or touch it.

And finally, the SSD is out, with the 2 screws untouched.

I return the SSD to check if windows starts normally, and it does!!


I use a msata to sata adapter in order to have a "common" interface for clone the SSD.

Cloning windows 8 with UEFI is a little bit hard, I try 3 options but the one that works perfect was using a cloning station, I have to use a normal hard drive to make a temporary image, because I only have one msata to sata adapter. The path was 256SSD ---> 320HDD ---> 1024SSD.

Finally I get windows working with the new SSD, expanding the windows partition with AOMEI Partition Asistant.

And voila !!! A Surface Pro 3 with 1 TB SSD !!! =D

The last step was cover the back of the surface, using cardboard, a little piece of foam and an avery decal, I made a simple decal, and now nobody see the "window", that remains there, ready to get a upgrade when 2TB SSD´s arrive to the market.
"Si las cosas que valen la pena, fueran fáciles, cualquier pendejo las haría!!"
¡¡¡La madre que te parió!!! Hay que tener cojones para hacerle algo así a un aparato que vale esa cantidad de dinero, pero... ¡¡¡olé!!!
ResponderEliminarMi enhorabuena por la operación satisfactoria.
(En mi caso, yo le puse una SD de 256GB y así tenía 512 de disco).
Perdón, me equivoqué, quise decir de 128GB. De 256GB valían demasiado dinero y solo había un modelo.
EliminarGracias!! Mi problema original era el almacenamiento (en mi anterior laptop tengo un SSD de 250 y un HDD de 1TB, ambos al 85% de capacidad) y aunque una unidad usb 3.0 hubiese sido lo mas sencillo, definitivamente fue mas excitante (peligrosa!!), y gratificante esta modificación.
Eliminaren el que el grosor ?
ResponderEliminarMuchas felicidades Jorge!!!
ResponderEliminarEnhorabuena, hasta HackADay ha publicado tu logro, asi que espera un buen numero de visitas a tu pagina.
http://hackaday.com/2015/04/28/upgrading-a-microsoft-surface-to-a-1-tb-ssd/
Saludos!!
Max
Cool Mod :-) brave guy
ResponderEliminarnicee
ResponderEliminarYou have stones, man :)
ResponderEliminarYou are awesome !!!! I respect it alot !
ResponderEliminarEste comentario ha sido eliminado por el autor.
ResponderEliminarHola Senior. Usted son mi bleeping HERO!
ResponderEliminarIf you run out of space before 2 GB SSD's are available, use ZIPmagic DoubleSpace or ZIPmagic DriveSpace to double your available storage. No cutting needed :)
ResponderEliminarI must say that I don´t want you to do the same with your surface in any ... mmicrosoftsurface.blogspot.com
ResponderEliminarIs it possible to do the same using laser to open surface?
ResponderEliminarI did it also!
ResponderEliminarThanks for the inspiration. I have put up a site with photos that have some measurements on it in case someone else wants to do it. Warning this is not for the faint of heart and you take a good chance of bricking a very expensive device...
http://surfacepro3harddrive.apps-1and1.com/
That is beautiful handy work!
ResponderEliminarSaludos ; de favor incluye las dimensiones en milimetros donde queda localizado el SSD. Please!
ResponderEliminarIt's really awesome. This post is called useful and interesting post. I really appreciate your work. If anybody want to buy a new Microsoft Surface Pro with new discounted prices because of Christmas please contact us.
ResponderEliminarMicrosoft Surface pro 3
Alguien sabe hasta cuanto de memoria sd se puede ampliar el surface 3 pro
ResponderEliminarThank you for sharing your experience. Very cool!
ResponderEliminarThank you for sharing your experience. Very cool!
ResponderEliminarDude, you are insane! That was absolutely BRILLIANT! Not sure I have the patience or steady hands to take a Dremel to my SP3 though! Well done!
ResponderEliminarAnd this is how to do it MacGyver style!
ResponderEliminarhttp://postimg.org/image/yde5p3eyj/
Thanks for the post, was a nice guide. Btw, I only did this way because my SSD was dead! Didn't have much to lose. Worked like a charm ;)
EliminarWow!!!!! , long time ago since not checking this post, you really surprise me, you only use this 2 tools?? how much time took you??
EliminarCheckout my video... I did it from start to finish. https://www.youtube.com/watch?v=ifEkDeIXsd0
EliminarHola ! Cómo hiciste con los driver y el sistema operativo? Cómo los instalaste de vuelta? Las licencias de Windows pro y las de office ? Eso Cómo se soluciona?
ResponderEliminarSaludos
En el post menciona que clonó el disco duro usando otra computadora, lo hizo por medio de un adaptador mSATA a SATA y creo una imagen temporal en una pc (no menciona que software uso para clonarlo, pero te recomiendo "Acronis") y sólo transfirio la imagen al mSATA nuevo, despues uso AOMEI Partition Asistant para agrandar la particion del mSATA nuevo y que utilizara el espacio completo
Eliminaramigo que increible logro!!! mis respetos
ResponderEliminar¿crees que se puedanlograr en una surface pro 1?
saludos!!!
https://youtu.be/tV6liqA-2Sk
ResponderEliminar¿Y cómo haces para cambiarle la batería de porquería que trae? ... porque encima tiene una vida útil la batería de 2 o 3 años dependiendo del uso ... básicamente si no podemos cambiar la batería en 2 o 3 años o lo usamos siempre enchufado o a la basura ... es algo descartable. Impresentable que no puedan traer una simple tapita para cambiar las cosas.
ResponderEliminarCambiar la batería, uff!!! Definitivamente es posible, pero creo que si no usas el equipo como tablet, consideraría modificar una power bank externo lo mas delgado que exista, haciendo un adaptador para que pueda alimentar el equipo y un soporte sencillo para ponerlo detras del equipo.
EliminarTe comento que después de 2 años, sigo utilizando el equipo para mi trabajo, y no tengo problemas para correr nunguna aplicación, todo funciona bien, mi bateria carga al 100 y con solo la batería, dura de 2 a 4 horas dependiendo del uso.
Si no hubiera otra alternativa, veo posible hacer el corte, pero tendría que removerse el soporte posterior, y hacer un corte de más de la mitad del equipo, la batería la venden en ebay por 25 dólares.
Otra alternativa menos invasiva pero mas exótica, es solo cortar una ventana en donde está el conector de la bateria, y hacer un surface "cuasimodo" con otra batería de surface en una joroba protectora (Impresa en 3D, o similar)
FInalmente, en verdad creo que el diseño se podría hacer mas amigable para cambiar estos módulos, el tema es la segmentación para ventas, checa el precio de un surface con diferente tamaño de disco duro, y sabrás por que a MS no le interesa un pepino hacer un surface fácil de escalar.
Puff muy bueno, acabo de dar con tu modificación en que buscaba info sobre la surface pro 3, aunque la que quizá adquiera es la de 64gb
ResponderEliminarJorge... You are a legend! I did it too. Your post inspired so much confidence. The only part where i nearly blue or was the fact that the right screw is connected to the motheboard with a ssd lock. That has to be physically severed using the dremel.
ResponderEliminarDude, you have a big pare of Brass Balls
ResponderEliminarDomingo you are a madman! You tempt me to do the same with my Pro but I will sleep on it for a while! :)
ResponderEliminarHey Jorge, quite a nice Surface haqck :)
ResponderEliminarCan you tell me which exact SSD you took? Have you tried others in the meantime? I have a broken screen that needs to be swapped, and then I would like to change the SSD also. I just want to know what to buy...
Thank you in advance, e saludos de Austria :)
This could be very handy for battery replacements!!!!
ResponderEliminarHey Jorge, quite a nice Surface haqck :)
ResponderEliminarCan you tell me which exact SSD you took? Have you tried others in the meantime? I have a broken screen بكجات سفر
that needs to be swapped, and then I would like to change the SSD also. I just want to know what to buy...
Thank you in advance, e saludos de Austria :)